A cracked windshield can look like a small cosmetic problem. It is not always small. The glass supports visibility, passenger protection, and several vehicle safety systems. NHTSA’s Federal Motor Vehicle Safety Standard No. 212 addresses windshield retention during crashes. This requirement shows why installation quality deserves serious attention.
Why is professional auto glass installation important? The answer involves more than fitting glass into a frame. Certified technicians inspect the pinch weld, remove old adhesive carefully, and apply compatible primers. They also follow the Auto Glass Safety Council’s AGRSS Standard for safe replacement practices. Incorrect adhesive thickness may create wind noise, water leaks, or weak bonding. Small errors matter.
Modern vehicles add another concern. AAA research on advanced driver assistance systems reported that windshield replacement can affect camera-based safety features. Lane departure warnings and automatic emergency braking may require precise recalibration. A camera mounted slightly off center can change what the vehicle detects. That detail is easy to miss.
Curing time matters too. Driving away too soon may expose the bond to movement, vibration, or weather. NHTSA safety standards provide the framework, but workmanship determines whether procedures are followed correctly. Still, professional service is not magic. Parts can arrive damaged, and calibration results may need checking. That is why reputable installers document glass specifications, adhesive systems, technician qualifications, and post-installation tests.
The five tips in this guide examine these practical safeguards. They focus on fit, bonding, visibility, calibration, and accountability. A cheaper installation may appear successful outside. The real test comes during sudden braking, heavy rain, or a rough road.
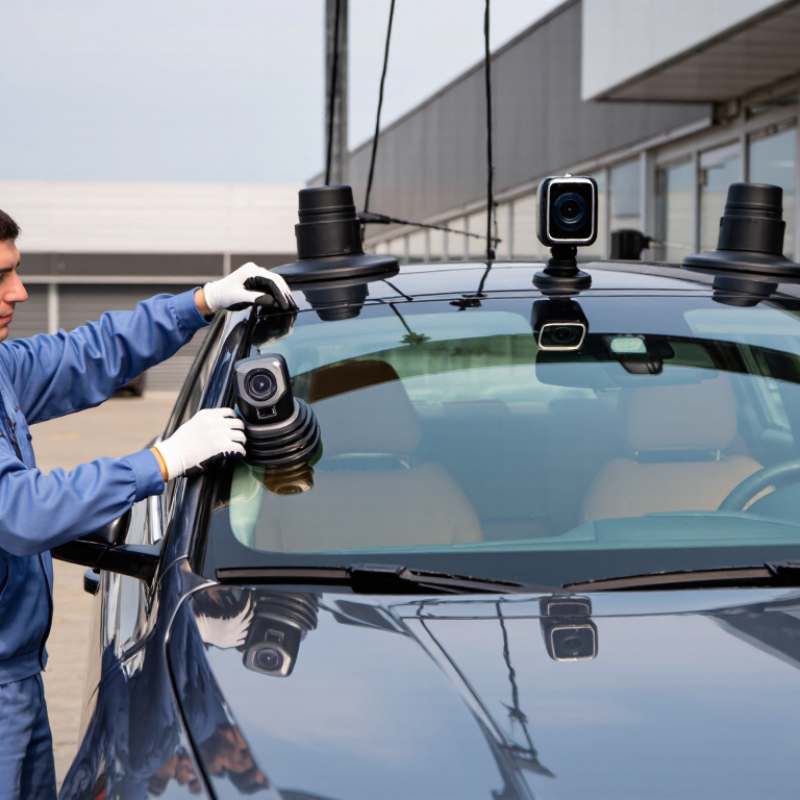
Auto glass is more than a clear window. It helps support the vehicle’s structure, protects occupants, and keeps airbags working as designed. A small alignment error can create wind noise, water leaks, or poor visibility during rain. These problems may appear minor at first. They are not always minor.
Professional technicians measure the opening and inspect the frame for hidden damage. The replacement glass should sit evenly, without uneven gaps or pressure points. A clean finish is not enough. I have seen installations that looked perfect but later developed leaks around one corner.
Adhesive quality, surface preparation, and curing time all affect how firmly the glass remains attached. Rushing this stage can weaken the installation. The vehicle may need to remain still until the adhesive reaches a safe handling strength.
Some vehicles use cameras or sensors near the windshield. After installation, these systems may require inspection or calibration. Skipping that step can affect lane warnings or emergency braking support. Small details matter here.
Ask questions. Request a final inspection. Professional work should include clear guidance about driving time, cleaning, and warning signs. Even experienced technicians can miss something, so careful verification remains essential.
Professional auto glass installation matters because a precise fit affects visibility, cabin comfort, and structural support. A skilled technician begins by checking the vehicle’s glass specifications, frame condition, and weather seals. Small measurements matter. A gap of only a few millimeters can create wind noise, water leaks, or uneven pressure.
Tip 1: Inspect the frame before removing old glass. Hidden rust or bent metal can prevent proper seating. Tip 2: Use the correct adhesive and apply it evenly. The bead should remain continuous, without thin spots or breaks. Tip 3: Set the glass carefully, using measured alignment points rather than guesswork. The technician should check the edges from inside and outside. It sounds simple.
Tip 4: Allow the adhesive to cure for the required time. Moving the vehicle too soon may weaken the bond. Tip 5: Test related systems after installation, including cameras or sensors near the windshield. Calibration may be necessary when driver-assistance features are present. Experienced technicians follow service procedures, wear suitable protective equipment, and document their checks. Still, even careful work can reveal an overlooked issue, such as a damaged clip or an old seal that looks usable. That is why a final water check, road-noise inspection, and visual review are valuable. A rushed installation may look acceptable in a parking lot. It can behave differently during rain, vibration, or sudden temperature changes.
A windshield adhesive does more than hold glass in place. It forms a flexible bond between the windshield and the vehicle frame. This connection supports body strength, limits water entry, and helps the glass respond to road vibration. A professional installer checks the adhesive’s curing conditions, working time, and compatibility with the vehicle materials. Small details matter.
Surface preparation is equally important. Dust, moisture, old sealant, or oily fingerprints can weaken the bond. The technician should clean the frame carefully and apply any required treatment in the correct amount. Too little may reduce adhesion. Too much may create uneven thickness. The bead must also be continuous, with no gaps near corners or edges. It should look consistent.
Temperature can change the installation process. Cold conditions may slow curing, while high humidity can affect some adhesive systems. A rushed job may appear neat but still lack reliable strength. Even experienced technicians can misjudge conditions. That deserves attention. After fitting the windshield, the vehicle should remain still for the recommended curing period. Safe driving depends on more than clear glass; it depends on a properly prepared bond that performs under braking, vibration, and changing weather.
Professional auto glass installation matters because a windshield does more than block wind and rain. It supports roof strength and helps protect passengers during a collision. A precise fit begins with checking the glass, frame, and surrounding trim. Small gaps matter.
The installer should remove old adhesive carefully and clean the bonding surface completely. Dust, rust, or moisture can weaken the seal. Fresh adhesive needs the correct thickness and enough curing time. Moving the vehicle too soon may create hidden leaks. A skilled technician also checks the glass position, trim alignment, and pressure points around the frame. These details prevent wind noise, water stains, and gradual interior damage.
A practical leak test can reveal problems before heavy rain does. Technicians may inspect the edges with controlled water, then check the dashboard, headliner, and floor for moisture. Vehicles with cameras or sensors may require calibration after glass replacement. Even careful work can miss a small issue, so a second inspection is worthwhile. I would not treat a clean appearance as proof of quality. The seal must perform under vibration, temperature changes, and road movement. Professional training, suitable tools, and documented procedures make that result more dependable.
Professional auto glass installation protects more than clear vision. It supports long-term vehicle value.
1. Verify the technician follows the Auto Glass Safety Council’s AGRSS safety standard. A correct fit depends on glass alignment, bonding, and clean preparation. A perfect-looking bead can still hide poor adhesion.
2. Confirm the proper urethane and curing time. Driving too soon may weaken the bond during a crash. Small timing details matter.
3. Ask whether the vehicle has a windshield-mounted camera. IIHS research found automatic emergency braking reduces rear-end crashes by about 50 percent. That benefit depends on accurate camera calibration after replacement.
4. Request calibration records and installation documentation. AAA research reported that advanced driver-assistance repairs can add hundreds or thousands of dollars to collision costs. Missing records may create questions during resale.
5. Inspect for wind noise, water leaks, and uneven edges after installation. These problems can damage trim, sensors, and interior surfaces over time. They also make a vehicle feel poorly maintained.
Professional service is not always the cheapest option. That is worth admitting. However, an inexpensive replacement can become costly when calibration fails, moisture enters the cabin, or a future buyer questions the work. NHTSA guidance emphasizes that vehicle safety systems must be repaired according to manufacturer procedures. Experienced technicians measure the opening, protect painted surfaces, and allow sufficient curing time. They also explain limitations instead of promising perfection. Long-term value is built through documented, careful work—not glass alone.
| Tip | Professional Installation Practice | Verified Safety or Quality Indicator | Long-Term Vehicle Value Benefit |
|---|---|---|---|
| 1. Use the Correct Glass | The technician confirms the glass specification, dimensions, tint, mounting points, and any integrated features before installation. | The replacement glass is marked or documented as meeting the applicable vehicle and safety-glazing requirements, such as FMVSS 205 in the United States or UNECE Regulation No. 43 in applicable markets. | Correct fit and specification help preserve structural alignment, visibility, weather sealing, and the vehicle’s original appearance. |
| 2. Prepare the Bonding Surface | Old adhesive is removed to the level recommended by the adhesive manufacturer, while exposed metal is inspected and treated appropriately. | The work area is clean, dry, free from contamination, and protected against untreated corrosion before the new adhesive is applied. | A properly prepared bonding surface reduces the risk of leaks, wind noise, rust development, and premature glass separation. |
| 3. Follow Adhesive Cure Requirements | The technician applies an automotive-grade urethane adhesive according to its technical data sheet, including bead placement, temperature, humidity, and handling limits. | The vehicle is released only after the adhesive manufacturer’s minimum drive-away time has been satisfied for the actual working conditions. | Correct curing supports windshield retention during normal driving and helps prevent movement, water intrusion, and repeat repairs. |
| 4. Check ADAS Calibration | If the vehicle has a windshield-mounted camera or sensor, the technician checks the manufacturer’s requirements and arranges static or dynamic calibration when required. | A calibration report or diagnostic record confirms that applicable systems, such as lane-departure warning or automatic emergency braking, were checked after replacement. | Accurate sensor alignment helps maintain driver-assistance performance and protects the vehicle’s technical functionality and resale appeal. |
| 5. Inspect and Document the Finished Work | The completed installation is inspected for alignment, molding fit, adhesive squeeze-out, glass damage, water sealing, and interior or exterior trim condition. | The service record includes the installation date, glass specification, adhesive information, calibration status when applicable, and any warranty terms. | Clear documentation supports future maintenance, warranty claims, vehicle history records, and buyer confidence. |
Auto glass supports the vehicle structure, protects occupants, and helps airbags work as designed. It is not just a clear window.
Uneven gaps may create wind noise, water leaks, and poor visibility during rain. A corner may leak later, even after looking perfect.
The technician should measure the opening and inspect the frame, seals, clips, and painted surfaces. Hidden rust or bent metal can affect the fit.
Proper adhesive and surface preparation create a stronger bond. Moving the vehicle too soon may weaken it during sudden braking or a crash.
Look for even edges, consistent gaps, and smooth alignment inside and outside. A final water check can reveal a small leak.
Yes. Some vehicles need camera or sensor inspection and calibration after replacement. Skipping this step may affect lane warnings or emergency braking support.
The technician should review the glass, test for water leaks, inspect road noise, and confirm related safety systems. Documentation helps too.
Not always. A lower price can become expensive after leaks, failed calibration, or interior damage. Still, professional work is not automatically flawless.
Clean alignment, proper bonding, and clear records show that the vehicle received careful maintenance. Future buyers may feel more confident.
Ask about safe driving time, cleaning instructions, warning signs, and calibration records. I would also ask for a second inspection when something feels wrong.
Why is professional auto glass installation important? Because correctly installed glass is a critical part of vehicle safety, visibility, and structural support. Skilled technicians carefully measure and position the windshield or window to achieve a precise fit, helping maintain proper alignment and reducing the risk of movement, rattling, or visibility problems. They also select and apply suitable automotive adhesives, allowing the glass to bond securely and perform reliably during everyday driving and sudden impacts.
Professional installation can also help prevent water leaks, wind noise, corrosion, and damage to surrounding components. By following careful preparation and curing procedures, technicians create a stronger seal and reduce the likelihood of future repairs. Quality workmanship protects the vehicle’s interior, supports dependable performance, and helps preserve its long-term value. Choosing expert auto glass service is therefore a practical investment in safety, durability, comfort, and the overall condition of the vehicle.

AGS Glass